




How to Fix Ugly Wall Flaws Hidden by Critical Light
12 hours ago
5 min read
Written by Marc Sharkey, Owner of Dynamic Painting Inc. | Calgary and Airdrie, Alberta
Why can a wall look perfect straight-on and flawed from the side?
A wall may appear smooth if you look at it from the doorway, but when the sunlight moves across it, it can show the joints or previous repairs. The fact that this happens can be a surprise following a new coat of paint, and it also shows the project team that both the direction of the light and the condition of the wall are important.
Bright staged Calgary living room. Photo courtesy of Dynamic Painting Inc.
Before finalizing the details, designers, builders and homeowners should discuss these matters. In the case of rooms that have strong side lighting, it may be necessary to carry out extra surface work, use a different paint finish, or provide a sample of the completed appearance so that everyone can agree on the outcome.
Critical light is defined as intense, directional light that falls onto a surface at a low angle; for instance, a window at the end of a long wall or a nearby light fitting can make small bumps or dips appear as shadows. Differences in the paint's sheen can also be seen in the reflections. All of these problems may occur simultaneously, but each of them requires a separate solution.
When a repaired edge projects from the surface, examine it and smooth it. A slight dip may have to be filled in. In some cases, a patch may look smooth but appear duller than the rest of the wall, which could be due to differences in how the wall absorbs paint or in the coating. Identifying the exact problem will help keep repairs on track. If you repaint the same area repeatedly without knowing the cause, the problem may still show.
Ask the homeowner when the wall looks most problematic and where they are standing when they notice the issue. If possible, examine the wall at that moment. A photograph can help identify the area, but it is easier to agree on what needs repair if you look at the wall together.
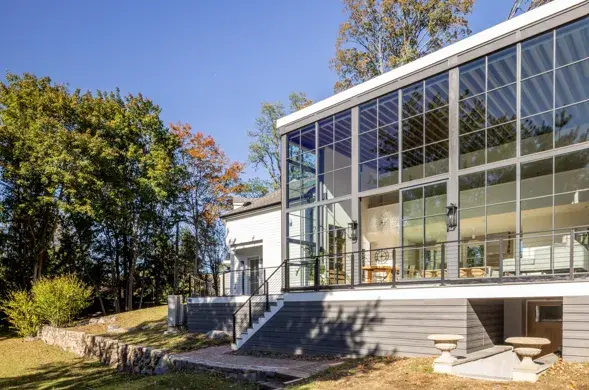
Bright sunroom in the same Calgary home. Photo courtesy of Dynamic Painting Inc.
Early in the project, inspect the large windows, the glass stairwells, and the long walls, and find out about any light fittings still to be installed, since the lighting used during construction may be very different from what the homeowner will use every day.
When you intend to install a wall light beside a wall that has been smoothly painted, you should discuss how near the beam will come to the wall and how much surface irregularity you are willing to accept before deciding on the position of the light; this will have an effect on both where the light is placed and on the way the wall is prepared.
Ensure that the wall in question is indicated on the plans or clearly described in the written scope. Simply stating that the living room walls are to be "repainted and repaired" may be too general. You should state whether the wall needs only patching or requires full resurfacing, specify who will carry out the work, and state when the team will inspect it before proceeding with painting.
Level 5, as defined by the Gypsum Association in document GA-214-2021, applies to smoothly finished gypsum surfaces that are subjected to critical lighting, have non-flat finishes or are deep in colour. For Level 5, add a full-surface skim coat to the joint and fastener treatment required at Level 4. This skim coat can be joint compound or a specially produced material, to be applied according to the instructions given. You still need to use the appropriate primer as part of the painting specification. While a Level 5 finish reduces surface differences, it does not guarantee perfect flatness.
When looking at an existing house, first assess the wall's actual condition before recommending a finish level. Repainting may involve previous repairs, multiple layers of paint, or texture changes, all of which require extra care. If a full skim coat is necessary, we explain this beforehand. Simply sanding more won't make the wall reach Level 5.
When preparing interiors, we use Festool sanding tools with HEPA dust extractors to smooth surfaces while removing dust immediately. The abrasive material and pressure should suit the material in question. Although dust collection helps, you still need to protect the area, clean up, and then inspect again. Having the equipment isn't enough to tell you whether a repair is ready for painting.
Finished Calgary open-concept living dining and kitchen. Photo courtesy of Dynamic Painting Inc.
A paint that has less shine is better at concealing small flaws than one that is glossy, which is why flat or matte finishes are suitable for difficult walls, provided that they meet the room's requirements regarding cleaning and durability. Choose the paint and sheen together, then examine a dried sample in the actual room.
You cannot tell from a small patch how the entire wall will reflect light, so for complicated surfaces I recommend creating a sample area that includes the repair, the selected primer, and the final coats. This lets the client see the actual result before it's applied everywhere.
Primers also play a specific role; a new coating applied to an already painted surface may be absorbed differently. Choose the type of primer and the degree of application according to those conditions and the instructions given by the coating manufacturer. A properly carried-out repair might require spot priming, while more extensive resurfacing could call for a more thorough priming plan. Ordinary primer is not capable of filling a depression or smoothing out a ridge.
If applying an additional coat of paint helps, then it will do so because the colour hasn't covered properly. Although we may decide in advance to apply a third coat on walls that are difficult or when there is a large change in colour, this decision should be made only after examining the wall. If a repaired edge still projects above the surface, fix the surface.
It is essential to apply the paint in an even manner. Follow the coverage and recoating guidelines in the product instructions, use the right tools, and plan to blend sections while the paint is still wet. Carrying out too many small touch-ups may result in obvious marks or changes in the shine. When painting a main wall, you could end up having to repaint the entire surface up to its natural edge. Everyone should use the sample as a reference. GA-214 suggests producing mock-ups that display the final appearance and that match the lighting in the room when it has been finished. Inspections must take both natural and installed lighting into account. Although a portable light can help to identify any defects, the final inspection should be based on how the room will actually look.
Modern Calgary condo kitchen and hallway. Photo courtesy of Dynamic Painting Inc.


